Predicting Loan Default Using MindsDB, PostgreSQL, and Streamlit.
In this article you will learn how to predict loan default from a PostgreSQL using Mindsdb and also deploying the model.


Loan default prediction is a crucial aspect of financial and risk management as it enables organizations to make better decisions about whether a customer is likely to fail to repay a loan based on their repayment history. This allows them to make faster lending decisions and avoid potential losses. In this tutorial, not only will you learn how to predict loan defaults using machine learning, but you'll also learn how to do it directly from the database using MindsDB (using a database😲 you heard that right). You must be surprised and excited, so without further ado, let's get started!
What is MindDB?
MindsDB is a machine learning platform that enables you to directly perform machine learning on a database without the need for traditional approaches such as object-relational mappers or database connectors if you wish to perform machine learning by using other programming languages such as Python. Unlike these methods, MindsDB offers a more straightforward way to perform machine learning directly on the database. It supports integration with state-of-the-art machine learning models, such as Hugging Face, Scikit-learn, LightGBM, etc. This means that you can use your favorite machine-learning models without any worries about compatibility.
With MindsDB, building, training, optimizing, and deploying your ML models is straightforward and can be accomplished with simple SQL statements. If you're someone who enjoys using SQL and wants to integrate machine learning with your database, MindsDB is the perfect solution for you. You don't need to worry about learning new programming languages as long as you have a good understanding of SQL.
Workflow of Article
Let’s take a look at the workflow for this article. Basically, this article will be divided into three sections:
Data Preparation.
Building ML Using Mindsdb
Deploying the ML model.
Data Preparation
As you may recall, earlier we discussed how MindsDB can take your database to the next level by integrating ML. In this tutorial, we will focus on connecting a database to Mindsdb. Before we dive in, it's important to note that there is no existing database available for us to use for machine learning purposes. However, we can create a mock database to simulate what a real database would look like. Specifically, we will learn how to connect Mindsdb to a Postgresql database.
To get started, we will need a dataset to work with. We can obtain this dataset online in CSV format and transform it into a Postgresql database. One such dataset can be found on Kaggle using the following link.
Dataset Information
Before we start transforming the CSV file into a Postgresql database, let's begin by discussing what the dataset contains. The dataset includes records of individuals who may default on a loan or not, and it comprises 34 features, both numerical and categorical. Below is a comprehensive list of all the features present in the dataset.
ID: Unique identifier for each loan application.
Year: The year in which the loan was applied for.
Loan_limit: The maximum amount of money that the borrower can borrow.
Gender: The gender of the borrower.
Approv_in_adv: Whether the loan was approved in advance or not.
Loan_type: The type of loan applied for (e.g. personal loan, business loan, etc.).
Loan_purpose: The purpose for which the loan is being taken (e.g. home purchase, debt consolidation, etc.).
Credit_Worthiness: A measure of the borrower's creditworthiness, based on their credit history and other factors.
Open_credit: The number of open lines of credit the borrower has.
Business_or_commercial: Indicates whether the loan is for a business or commercial purpose.
Loan_amount: The amount of money borrowed.
Rate_of_interest: The annual interest rate charged on the loan.
Interest_rate_spread: The difference between the interest rate charged on the loan and a benchmark rate.
Upfront_charges: Any upfront charges or fees associated with the loan.
Term: The length of time the borrower has to repay the loan.
Neg_amortization: Whether the loan has negative amortization, meaning the borrower's monthly payments are not enough to cover the interest owed, resulting in the loan balance increasing over time.
Interest_only: Whether the borrower is only required to pay the interest on the loan for a certain period of time before starting to pay down the principal.
Lump_sum_payment: Whether the borrower can make a lump sum payment to pay off the loan early.
Property_value: The value of the property being purchased or used as collateral for the loan.
Construction_type: The type of construction being financed by the loan (e.g. new construction, renovation, etc.).
Occupancy_type: The occupancy status of the property being financed (e.g. owner-occupied, non-owner-occupied, etc.).
Secured_by: What collateral, if any, is securing the loan.
Total_units: The total number of units in a multi-unit property being financed.
Income: The borrower's income.
Credit_type: The type of credit used by the borrower (e.g. revolving credit, installment credit, etc.).
Credit_Score: The borrower's credit score.
Co_applicant_credit_type: The type of credit used by the borrower's co-applicant (if applicable).
Age: The age of the borrower.
Submission_of_application: How the borrower applied for the loan (e.g. online, in-person, etc.).
LTV: The loan-to-value ratio, which is the ratio of the loan amount to the value of the property being financed.
Region: The region where the property being financed is located.
Security_Type: The type of security being used to secure the loan.
Status: Whether the loan is in default or not.
DTIR1: The borrower's debt-to-income ratio, which is the ratio of the borrower's total debt payments to their income.
Our objective is to use classification techniques to predict whether a customer will default on a loan or not, based on their characteristics or features. Now that we have a better understanding of the dataset, let's proceed with transforming it into a Postgresql database.
To get started, the first step is to create a database in PgAdmin and name it "Loan".
Once you've created the database, you'll need to create a table that includes all 34 features present in the dataset, along with their respective datatypes, as shown in the following code. Also don't forget to name the table "loan_default" as shown below:
DROP Table loan_default;
CREATE TABLE loan_default(
    ID VARCHAR(10) PRIMARY KEY,
    year SMALLINT,
    loan_limit VARCHAR(10),
    gender VARCHAR(20),
    approv_in_adv VARCHAR(10),
    loan_type VARCHAR(10),
    loan_purpose VARCHAR(10),
    Credit_Worthiness VARCHAR(10),
    open_credit VARCHAR(10),
    business_or_commercial VARCHAR(10),
    loan_amount NUMERIC,
    rate_of_interest NUMERIC,
    Interest_rate_spread NUMERIC,
    Upfront_charges NUMERIC,
    term NUMERIC,
    Neg_ammortization VARCHAR(10),
    interest_only VARCHAR(10),
    lump_sum_payment VARCHAR(10),
    property_value NUMERIC,
    construction_type VARCHAR(10),
    occupancy_type VARCHAR(10),
    Secured_by VARCHAR(10),
    total_units VARCHAR(10),
    income NUMERIC,
    credit_type VARCHAR(10),
    Credit_Score SMALLINT,
    co_applicant_credit_type VARCHAR(10),
    age VARCHAR(10),
    submission_of_application VARCHAR(10),
    LTV NUMERIC,
    Region VARCHAR(10),
    Security_Type VARCHAR(15),
    Status SMALLINT,
    dtir1 NUMERIC
);
After that is done we can then copy the information from the csv dataset into the loan_default table that has just been created in the database using the below command:
COPY loan_default(
       ID, year, loan_limit, Gender, approv_in_adv, loan_type,
       loan_purpose, Credit_Worthiness, open_credit,
       business_or_commercial, loan_amount, rate_of_interest,
       Interest_rate_spread, Upfront_charges, term, Neg_ammortization,
       interest_only, lump_sum_payment, property_value,
       construction_type, occupancy_type, Secured_by, total_units,
       income, credit_type, Credit_Score, co_applicant_credit_type,
       age, submission_of_application, LTV, Region, Security_Type,
       Status, dtir1)

FROM "file_location (C:\\loan_default.csv)"'
DELIMITER ','
CSV HEADER;
Remember to change the query in the FROM clause to the location of the loan_default.csv on your PC, and also to place the CSV dataset in your PC's public folder so that PostgreSQL can access it without issue.
Also after we are done creating the loan_default table the next thing is that we will create a small portion of the loan_default table to only contain about 500 records (since the loan_default table contains above 100,000 records) so that we can experience quick model training when we start building our model using MindsDB. This can be accomplished using the following code:
CREATE TABLE loan_default_lite
AS (
SELECT *
    FROM loan_default
    ORDER BY RANDOM()
    LIMIT 5000
);
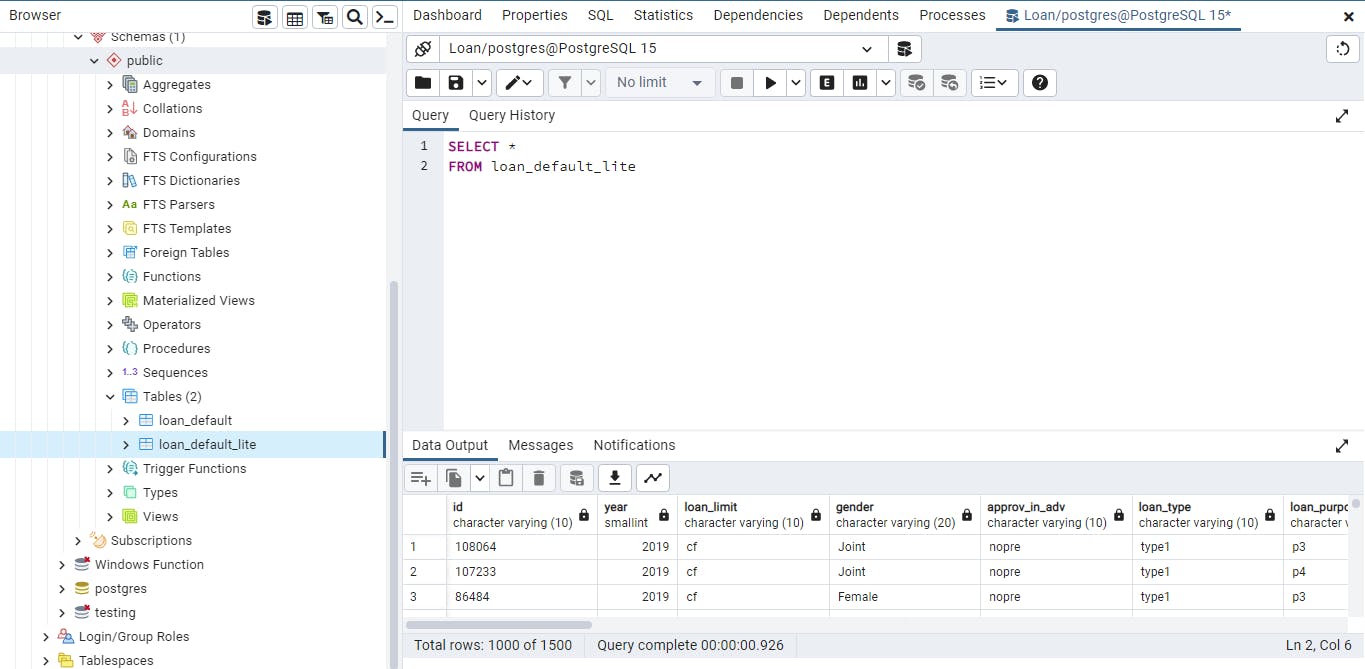
So therefore we have two tables in the loan database. The loan_default table and the loan_default_lite table as shown below:
Now that you imported the CSV file into PostgreSQL as a database and that you've created the lite_version of the table. The next thing will be to bring the localhost database online so that it can be accessed using MindsDB. To accomplish this, we can use a free platform such as ngrok, which allows us to put localhost online.
Firstly to use ngrok you need to signup for free on their platform so you can have your API or authentication key. You can do that using the following link. After you’ve signup on ngrok then you will need to download the ngrok app on your computer. Choose your download option based on your computer OS.
Once you have downloaded the ngrok app, you can open it and connect your account by typing in the code below on the ngrok app you just downloaded. You can get your token key by scrolling down on the above page image on ngrok website.
ngrok config add-authtoken token_key
Where token_key stands for your authentication key.
After that, you can now type the following command on ngrok app to move your local host database online.
ngrok tcp 5432
5432 is the default port number for PostgreSQL but you can also verify that by running this SQL query in pgAdmin.
SELECT *
FROM pg_settings
WHERE name = 'port';
Now that you’ve run the ngrok tcp 5432 command you now have your PostgreSQL database online as shown below. You can now access it through the TCP link shown in the forwarding part.
Connecting to MindsDB
Now that the Postgresql database is online, it can be accessed through the MindsDB cloud platform, enabling us to perform machine learning on the database. To get started, you'll need to have an account on Mindsdb. If you don't already have an account, you can sign up for free using the following link.
Once you have signed up on MindsDB (you will be directed to MindsDB cloud editor), you can connect to the Postgresql database by using the following SQL statement.
CREATE DATABASE psql_datasource         --- display name for the database
WITH ENGINE = 'postgres',               --- name of the MindsDB handler
PARAMETERS = {
  "host": " ",                          --- host name or IP address
  "port": ,                             --- port used to make TCP/IP connection
  "database": " ",                      --- database name
  "user": " ",                          --- database user
  "password": " "                       --- database password
};
Let's go over each of the above statements:
The first line of the SQL query CREATE DATABASE data_nameis used to display the name of the database on MindsDab.
The second line, WITH ENGINE = 'postgres', is used to tell Mindsdb what type of SQL engine you want to connect to, such as MySQL, PostgreSQL, etc. In this case, we are connecting to a PostgreSQL database.
The PARAMETERS section is used to indicate how Mindsdb will connect to the PostgreSQL database.
The host is the IP address that is obtained from the ngrok tcp command and it looks like this ``/4.tcp.eu.ngrok.io’.
The port is the number after the colon in the TCP IP address, e.g. 16417.
Database refers to the name of the database that you want to connect to in your PostgreSQL server, and you may have different databases in the PostgreSQL server. Therefore, you need to specify the database you want to access information from.
User refers to the username of your PostgreSQL database, and the default username is "postgres".
Lastly, password is the password that you enter when you want to access your database on pgAdmin.
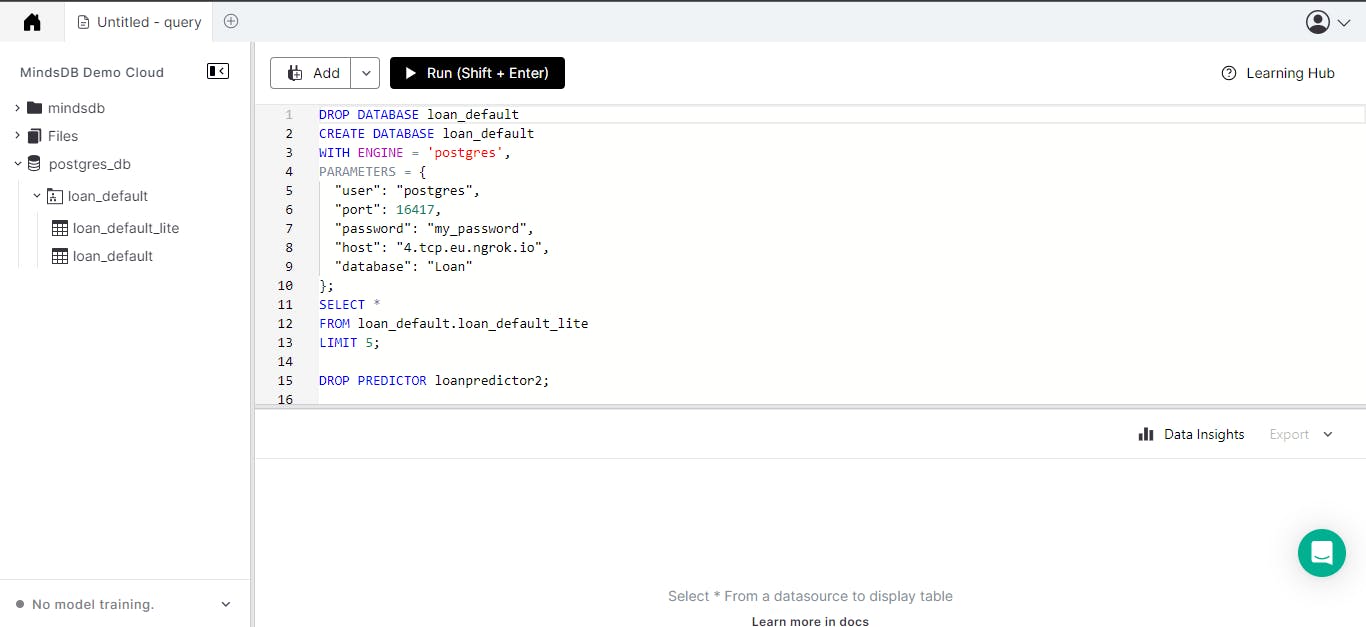
For example, to connect to the PostgreSQL database that contains our loan_default table the following statement was typed in the Mindsdb cloud editor.
Note: There is something about ngrok if you re-run the ngrok tcp port_number , the address changes so be sure to change the address on the MindsDB cloud editor if you rerun the ngrok tcp command.
You can run the following code on the MindsDB cloud editor to view the result on the Mindsdb as shown below:
SELECT *
FROM loan_default.loan_default
LIMIT 5;
Building ML Using MindsDB
Now that the database has been connected to MindsDB and we can view all of its content, the next step is to build the ML model using MindsDB. MindsDB offers a wide range of machine learning functionalities, including regression, classification, and NLP, among others. One of the most interesting things about Mindsdb is that it contains some state-of-the-art models that you can employ, but you can also decide to bring your own machine-learning model using FastAPI. In this article, we will be working with the model on MindsDB. However, if you wish to learn how to bring your own model into MindsDB, you can click here.
To create a model in MindsDB the following code is used.
CREATE MODEL minddbs.model_name
FROM database_or_file_location
    (SELECT * FROM table_name)
PREDICT label;
CREATE MODEL mindbs.model_name -- Modify model_name to the name you wish to call your model
FROM database_or_file_location -- Pass in the name of the folder where the table is located.
SELECT * FROM table_name -- Pass in the name of the table you want to predict
PREDICT label -- Pass in the name of the label you want to predict
So in our case, the code will look like this:
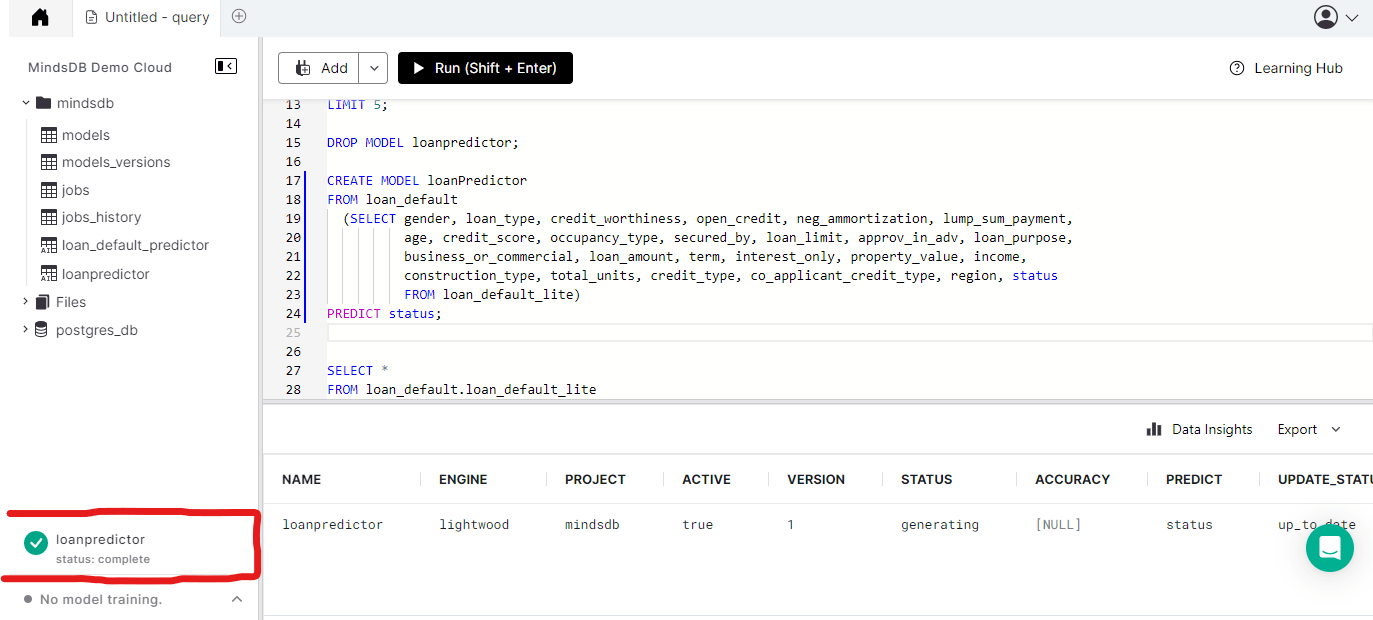
CREATE MODEL loanPredictor
FROM loan_default
  (SELECT gender, loan_type, credit_worthiness, open_credit, neg_ammortization, lump_sum_payment,
          age, credit_score, occupancy_type, secured_by, loan_limit, approv_in_adv, loan_purpose,
          business_or_commercial, loan_amount, term, interest_only, property_value, income,
          construction_type, total_units, credit_type, co_applicant_credit_type, region, status
          FROM loan_default_lite)
PREDICT status;
Now if you run the above code the model will be created so just wait for it to finish training once it is done training you can then start to use it to predict.
TIP: To drop your model, use DROP MODEL model_name.
Now that the model has finished training. We can now predict and test the model to see how well it performs.
Predicting in MindsDB is also a fairly simple process, involving the use of a simple SQL query. To make a prediction, all you need to do is select the label you wish to predict from the model or predictor name, and then include the predictor variable (i.e., the X feature) in the WHERE clause of the SQL statement, as demonstrated below.
SELECT label
FROM model_name
WHERE features, AND features...
For instance, making predictions in our case looks like this:
SELECT Status
FROM mindsdb.loanpredictor
WHERE loan_limit='cf'
AND gender='Female'
AND approv_in_adv='nopre'
AND loan_type='type1'
AND loan_purpose='p3'
AND credit_worthiness='l1'
AND open_credit='nopc'
AND business_or_commercial='nob/c'
AND loan_amount=486500
AND term=360
AND neg_ammortization='not_neg'
AND interest_only='int_only'
AND lump_sum_payment='not_lpsm'
AND property_value= 648000
AND construction_type = 'sb'
AND occupancy_type = 'pr'
AND secured_by = 'home'
AND total_units = '1U'
AND income = 7920
AND credit_type = 'EXP'
AND credit_score = 603
AND co_applicant_credit_type = 'CIB'
AND age = '55-64'
AND submission_of_application = 'to_inst'
AND region = 'south';
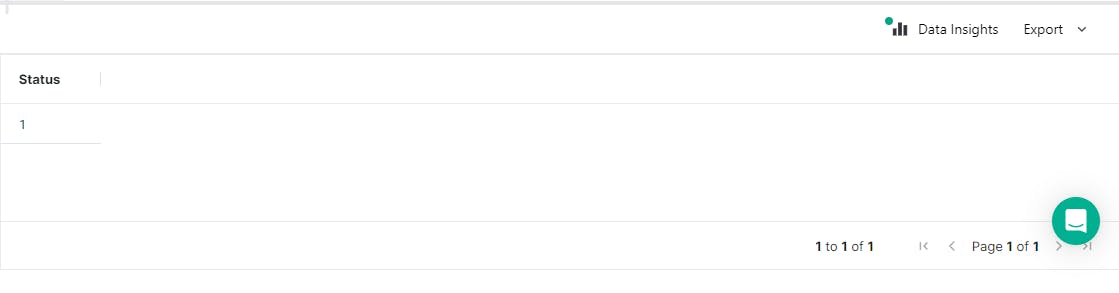
If you run the above code you should have the result for the prediction as shown below. Yay!

Deploying the ML Model
Now that you've finished testing the Model, the next thing is to deploy the model. The interesting is MindsDB provides different ways of deploying the model including REST API, using Python or Javascript SDK (which allows you to build Web-App), etc. In this tutorial, we will deploy the model as a web app so we will be using the Python SDK and also a popular web-app framework in Python called Streamlit.
To be able to use the Python SDK you need to install the MindsDB library using the pip installer:
pip install mindsdb_sdk
Also, we will be using two third-party libraries in Python including Pandas and Streamlit. So if you don't have it installed on your PC you can also install it using pip
pip install streamlit
pip install pandas
Now that you're done installing the above libraries. It's time to create the web app using Streamlit.
Firstly you will create a .py file that will contain all the code for creating the web app using Streamlit.
We will start by importing the necessary libraries as shown below:
import mindsdb_sdk
import pandas as pd
import streamlit as st
Then will establish a connection between the model on MindsDB and the web app so that we can access the model functionality in the web app. This is made possible using the MindsDB SDK as shown below.
server = mindsdb_sdk.connect('https://cloud.mindsdb.com', login='user_name', password='my_password')
project = server.get_project("mindsdb")
model = project.list_models()[1]
Let's go over the above code:
server = mindsdb_sdk.connect('https://cloud.mindsdb.com', login='user_name', password='my_password')
The above code allows you to connect and access all the information from the MindsDB cloud in your web app. You need to correctly specify your credentials.
project = server.get_project("mindsdb")
In addition, the code above enables you to retrieve all the projects from MindsDB, which includes all the models you've trained using the platform. Typically, all projects created are stored in the MindsDB directory.
To retrieve a specific model, you can use the following code to list all the available models under the project, and then use the subscript operator to specify the index of the model you wish to use:
model = project.list_models()[1]
So in our case, the loan default model is the second element in the list of models that are available.
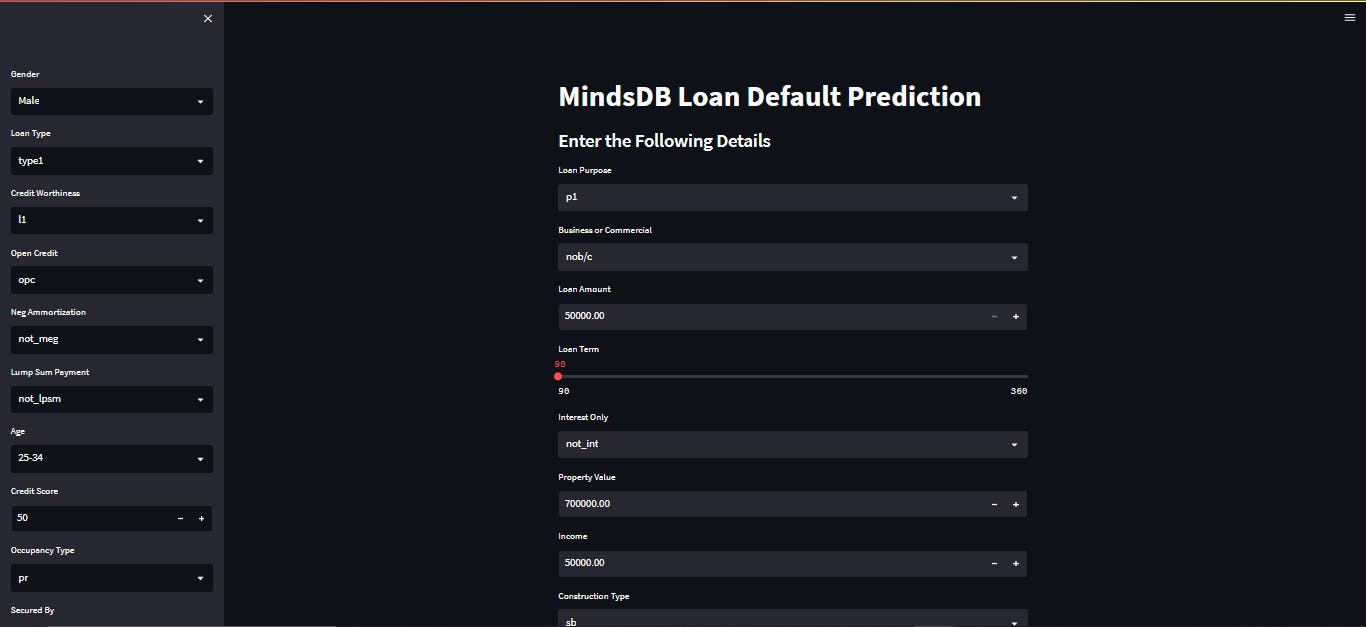
Now that you understand the process, the next step is to write the code for building the web app using the Streamlit framework. The app will contain components such as a title, select box, radio buttons, and more. To avoid making this article too lengthy, we won't go into detail on how it all works, but you can learn more about the Streamlit components required to build this by clicking here.
The code for building this app is:
import streamlit as st
import mindsdb_sdk
import pandas as pd
# Connecting to MindsDB
server = mindsdb_sdk.connect('https://cloud.mindsdb.com', login='user_name', password='my_password')
project = server.get_project("mindsdb")
model = project.list_models()[1]
# Web App title
st.title("MindsDB Loan Default Prediction")
st.subheader("Enter the Following Details")
# Retrieving Input from user
gender=st.sidebar.selectbox("Gender", options=["Male", "Female"])
loan_type=st.sidebar.selectbox("Loan Type", options=["type1", "type2", "type3"])
credit_worthiness=st.sidebar.selectbox("Credit Worthiness", options=["l1", "l2"])
open_credit=st.sidebar.selectbox("Open Credit", options=["opc", "npc"])
neg_ammortization=st.sidebar.selectbox("Neg Ammortization", options=["not_meg", "neg_amm"])
lump_sum_payment = st.sidebar.selectbox("Lump Sum Payment", options=["not_lpsm", "lpsm"])
age = st.sidebar.selectbox("Age", ['25-34', '55-64', '35-44', '45-54', '65-74', '>74', '<25'])
credit_score = st.sidebar.number_input("Credit Score", min_value=0, max_value=1000)
occupancy_type = st.sidebar.selectbox("Occupancy Type", options=['pr', 'sr', 'ir'])
secured_by = st.sidebar.radio("Secured By", options=["home", "land"])
loan_limit=st.sidebar.radio("Loan Limit", options=["cf", "ncf"])
approv_in_adv=st.sidebar.radio("Approve in Advance",options=["pre", "nopre"])
loan_purpose=st.selectbox("Loan Purpose", options=["p1", "p2", "p3", "p4"])
business_or_commercial= st.selectbox("Business or Commercial", options=["nob/c", "b/c"])
loan_amount=st.number_input("Loan Amount", min_value=50000.00, max_value=5000000.00)
term=st.slider("Loan Term", min_value=90, max_value=360, step=2)
interest_only = st.selectbox("Interest Only", options=["not_int", "int_only"])
property_value=st.number_input("Property Value", min_value=0.00, max_value=20e6)
income = st.number_input("Income", min_value=0.0, max_value=1e6)
construction_type = st.selectbox("Construction Type", options=["sb", "mh"])
total_units = st.selectbox("Total Units", options=['1U', '2U', '3U', '4U'])
credit_type = st.selectbox("Credit Type", options=['EXP', 'EQUI', 'CRIF', 'CIB'])
co_applicant_credit_type = st.selectbox("Co-Applicant Credit Type", options=['CIB', 'EXP'])
region = st.selectbox("Region", options=['south', 'North', 'central', 'North-East'])
# Create a dictionary to store value
variables = {
"gender": gender,
"loan_type": loan_type,
"credit_worthiness": credit_worthiness,
"open_credit": open_credit,
"neg_ammortization": neg_ammortization,
"lump_sum_payment": lump_sum_payment,
"age": age,
"credit_score": credit_score,
"occupancy_type": occupancy_type,
"secured_by": secured_by,
"loan_limit": loan_limit,
"approv_in_adv": approv_in_adv,
"loan_purpose": loan_purpose,
"business_or_commercial": business_or_commercial,
"loan_amount": loan_amount,
"term": term,
"interest_only": interest_only,
"property_value": property_value,
"income": income,
"construction_type": construction_type,
"total_units": total_units,
"credit_type": credit_type,
"co_applicant_credit_type": co_applicant_credit_type,
"region": region
}
# Convert result to Dataframe
result = pd.DataFrame(variables, index=[0])
# Handler to predict the result
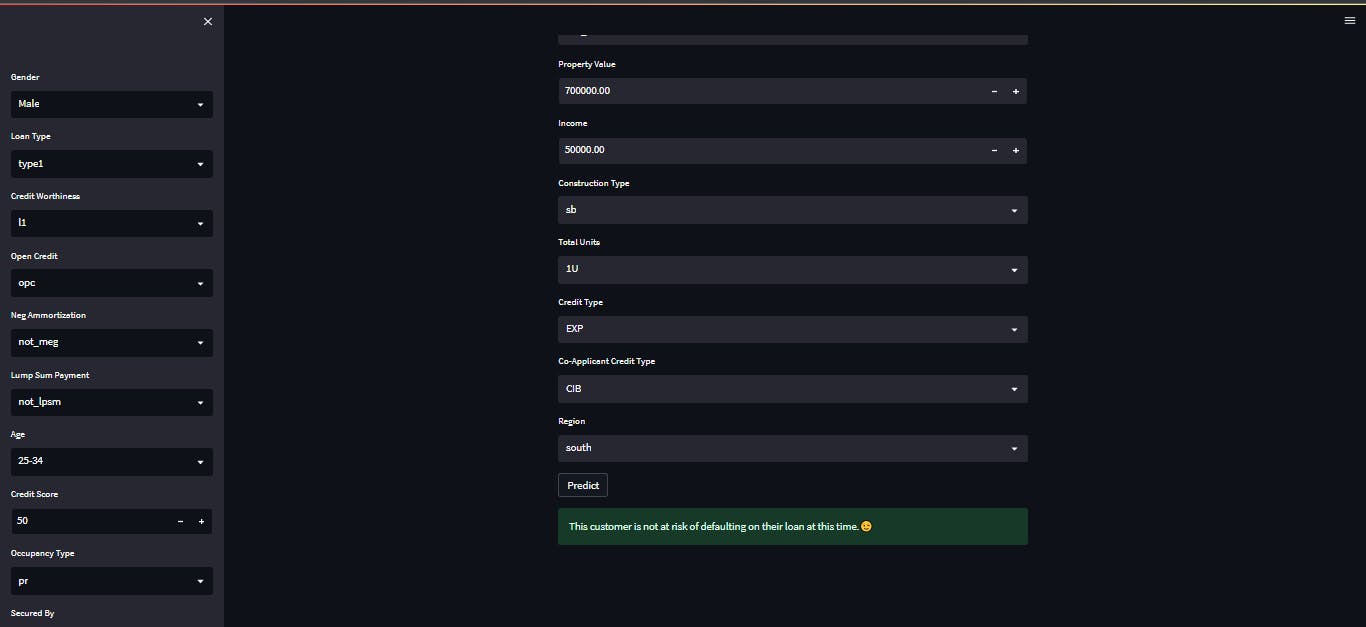
if st.button("Predict"):
if model.predict(result)["status"].loc[0] == 1:
st.warning(f"This customer is at risk of defaulting on their loan. Please contact them to discuss their account😥.")
st.success(f"This customer is not at risk of defaulting on their loan at this time.😉")
Now that, that's done we can then run the app using the following code in our command line.
streamlit run "web app.py"
Note you must specify the correct name you use to store the .py file and as well make sure you are in the right directory where the file is placed so you won't get an error.
Now that you have built the Streamlit app, there are several options available to deploy the app online, so that it can be accessed on the web. These options include Streamlit cloud platform, Heroku, and more. However, in this tutorial, we will not discuss how to deploy the app. We will provide you with resources that can help you learn about the deployment process, and the links to these resources will be provided below.
Conclusion
In this tutorial, you have learned about MindsDB, an open-source platform that takes databases to the next level. You also learned how to connect a PostgreSQL database to MindsDB and perform a loan default prediction. Additionally, you discovered another interesting feature of the MindsDB platform, which is the ability to deploy your model. Specifically, you learned about the Python SDK that allows you to build web apps using popular Python frameworks such as Streamlit. If you want to learn more about MindsDB and stay updated with the community, click here. Thank you for taking the time to read this. I look forward to seeing you in the next one.